How to add a chatbot to WordPress — the complete walkthrough
You can add a working AI chatbot to any WordPress site in roughly three minutes. Asyntai publishes an official plugin at /plugins/wordpress/asyntai-chatbot/ that handles the embed automatically, or you can paste one script tag manually if you prefer zero plugins. Both paths end with an assistant that reads your content fielding visitor questions around the clock.
Preview the chatbot on your WordPress site before installing
Type your WordPress URL below and see how the AI assistant would respond to visitor questions drawn from your real published content
Method one: the official WordPress plugin handles everything
The fastest path to adding a chatbot on WordPress is the dedicated plugin distributed through the Asyntai dashboard. It lives at /plugins/wordpress/asyntai-chatbot/, installs via the standard upload flow, and wires itself into every frontend page without touching your theme files or requiring a single line of code from you.
- Download from the dashboard, not the repositoryThe plugin ZIP is available at /plugins/wordpress/asyntai-chatbot/ inside your Asyntai account. Grab it, then head to Plugins in your WordPress admin and use the Upload Plugin button.
- OAuth popup replaces manual key entryAfter activation, a single button launches a popup that authenticates your Asyntai account and stores the site identifier in the plugin's settings row — no copying API tokens between browser tabs.
- Automatic script injection on every pageOnce connected, the plugin injects the widget loader in the footer hook so the chatbot appears on pages, posts, archives, and WooCommerce shop views without per-template edits.
Method two: paste a script tag if you want no extra plugin
Some WordPress administrators keep their plugin count deliberately lean. For those setups, the alternative path is equally quick: copy the Asyntai snippet from your dashboard and inject it through a header management tool or directly in your child theme. The outcome is identical — the same chatbot, the same content indexing, the same 36-language coverage — minus one row in your plugins list.
- Header plugin injectionUtilities such as WPCode or the Insert Headers and Footers extension expose a text area for third-party scripts. Paste the Asyntai tag there, save, and the chatbot loads sitewide without editing any PHP file.
- Child theme header.phpIf you manage a child theme, drop the snippet right before the closing head tag in header.php. It survives parent theme updates because child themes override safely.
- Google Tag Manager containerAlready running GTM on your WordPress site? Fire the Asyntai snippet as a Custom HTML tag on "All Pages" and it deploys through the same container you use for analytics and pixels.
Step-by-step: add a chatbot to your WordPress site right now
Pick the plugin method or the snippet method — both reach the same destination. Here is the plugin path laid out in four clean steps.
- Sign up at asyntai.com (free tier, no payment details required) and navigate to the Install section where the plugin ZIP waits at /plugins/wordpress/asyntai-chatbot/.
- Inside WordPress admin, open Plugins → Add New Plugin → Upload Plugin, select the downloaded ZIP, and press Install Now followed by Activate.
- Click the Connect to Asyntai button that appears on the new settings screen. A popup authenticates your account and writes the site ID back into WordPress automatically.
- Open any page of your WordPress site in a fresh browser tab. The chatbot launcher appears in the corner, already answering from your published pages and posts.
1. Download asyntai-chatbot.zip from dashboard
2. Plugins → Add New → Upload
3. Activate → Connect to Asyntai (OAuth popup)
4. Chatbot live on every page
# Alternatively, paste the snippet:
<script src="https://asyntai.com/widget.js"
data-id="your-site-id" async></script>
Adding a chatbot to WordPress — frequently asked questions
Answers to the practical concerns WordPress site owners raise before and during the chatbot install process.
Does the plugin work with every WordPress theme?
Yes. The plugin hooks into the wp_footer action, which is a standard WordPress hook that every properly built theme fires before the closing body tag. Classic themes like Astra, GeneratePress, and OceanWP support it, as do newer Full Site Editing block themes like Twenty Twenty-Four. Even fully custom themes built from scratch will work, because the chatbot relies on that universal footer hook rather than any theme-specific template structure.
Will adding the chatbot conflict with caching plugins like WP Super Cache or W3 Total Cache?
No. The chatbot script tag is static HTML that caching plugins store alongside your page markup. The widget itself fetches its live configuration from the Asyntai CDN on each page view, so cached pages always load the current chatbot settings. You never need to purge cache after updating your chatbot's appearance or behavioral instructions.
Can the chatbot read my WooCommerce products and answer shopping questions?
Absolutely. When the crawler indexes your WordPress site, WooCommerce product pages, category archives, and shop pages are treated like any other URL. The AI absorbs product names, descriptions, pricing, and availability so it can guide shoppers, compare items, and answer pre-purchase questions grounded in your real catalog.
What version of WordPress do I need?
The plugin is tested from WordPress 5.0 through the current 6.x line on PHP 7.2 and above. The snippet method has no WordPress version requirement at all since it is plain JavaScript — it works on any WordPress release that lets you inject code in the header or footer.
How does the chatbot handle visitors who write in languages my WordPress content does not cover?
The AI recognizes which language the visitor typed in and produces its reply in that same tongue, even when your underlying WordPress pages exist only in one language. A Korean visitor on an English-only blog receives Korean responses derived from the English source material. This automatic translation spans 36 languages without requiring WPML, Polylang, or any multilingual plugin on the WordPress side.
Where do captured leads end up?
Every lead — comprising the visitor's email and the complete conversation transcript — appears in your Asyntai dashboard under the Leads section. Optionally enable email forwarding so each new lead also arrives in your inbox, ready to import into a CRM, a Google Sheet, or whatever pipeline your WordPress business already uses for follow-up.
Can I add the chatbot to a WordPress multisite network?
Yes. Each subsite in the network is treated as a separate domain on the Asyntai side. Install and activate the plugin (or paste the snippet) on each subsite individually, connect each to its own Asyntai site slot, and each subsite gets an independent knowledge base and separate behavioral rules. The number of subsites you can cover tracks your plan level: Free handles one, Starter accommodates two, Standard permits three, and Pro scales to ten.
Is there a cost to try it before committing?
The free plan grants one connected WordPress site and 50 visitor messages per month at zero cost with no credit card required. That is enough volume to validate the chatbot on real WordPress traffic, review the conversation quality in the dashboard, and confirm the tone matches your brand before moving to a paid tier.
Add chatbot to WordPress — a practitioner's guide to getting AI chat running on any WordPress property
WordPress powers a staggering share of the public web, which means the question of how to add a chatbot to a WordPress site gets asked by an extraordinarily diverse population: solo bloggers selling digital downloads, regional law firms with five-page brochure sites, WooCommerce merchants processing hundreds of orders per day, membership communities running BuddyPress, universities publishing course catalogs, nonprofits collecting donations through GiveWP. Each of those operators has a different tolerance for technical complexity, a different budget, and a different idea of what "chatbot" even means. What they share is the underlying CMS — and the fact that adding any new capability to WordPress should feel like a WordPress task, not a detour into a third-party developer console. Asyntai was built around that principle: the chatbot reaches your WordPress visitors through either a native plugin or a plain script tag, reads your existing content without manual curation, and operates from an external dashboard that never clutters your WordPress admin with settings screens you did not ask for.
The plugin path is the one most WordPress administrators should reach for first because it eliminates the snippet-pasting step entirely. You download the ZIP from your Asyntai dashboard — the file lives permanently at /plugins/wordpress/asyntai-chatbot/ — then install it through the same Plugins interface every WordPress user touches when adding SEO tools, form builders, or security hardeners. Upload, activate, and a new settings screen appears with a single prominent action: Connect to Asyntai. Clicking that launches a popup where you authenticate (or create) your Asyntai account. The popup closes, the plugin stores your site identifier in the options table, and the chatbot is immediately active across every page, post, and archive on the site. No theme file was opened. No code was pasted. No developer was paged. The entire sequence — download, upload, activate, connect — takes less time than writing a moderately long paragraph about it.
For administrators who operate a strict plugin diet — the kind of site owner who counts active plugins on one hand and views each new one as a potential attack surface or performance tax — the snippet path delivers the same chatbot with zero footprint in the WordPress plugin ecosystem. Copy the Asyntai script tag from the Install tab in your dashboard, navigate to a header injection utility (WPCode is the most popular, but Insert Headers and Footers, Header Footer Code Manager, and a dozen others serve the same purpose), paste the tag, and save. If you run a child theme and prefer not to depend on a header plugin, open header.php and drop the script before the closing head tag. If Google Tag Manager already manages your third-party scripts, fire the Asyntai snippet as a Custom HTML tag triggered on all pages. The point is that the chatbot does not care how it reaches the page; it only needs its script tag to execute once per page load, and WordPress offers half a dozen legitimate ways to make that happen.
Once the chatbot is connected — whether through the plugin or the snippet — indexing begins without further input from you. The Asyntai crawler visits every publicly accessible URL on your WordPress site: pages, posts, custom post types, WooCommerce product and category pages, portfolio items, event listings, any permalink the sitemap exposes. That crawl builds a retrieval index the AI consults whenever a visitor types a question. The effect is that the chatbot knows your site as thoroughly as a dedicated employee who read every page top to bottom — except it never forgets a detail and never goes off-shift. When your WordPress content includes material the public cannot see — draft posts, password-protected pages, internal pricing documents, vendor contracts, staff training manuals — you feed those into Asyntai separately — uploading PDFs or pasting raw text through the dashboard interface. The AI merges both pools and draws from whichever source best answers each question.
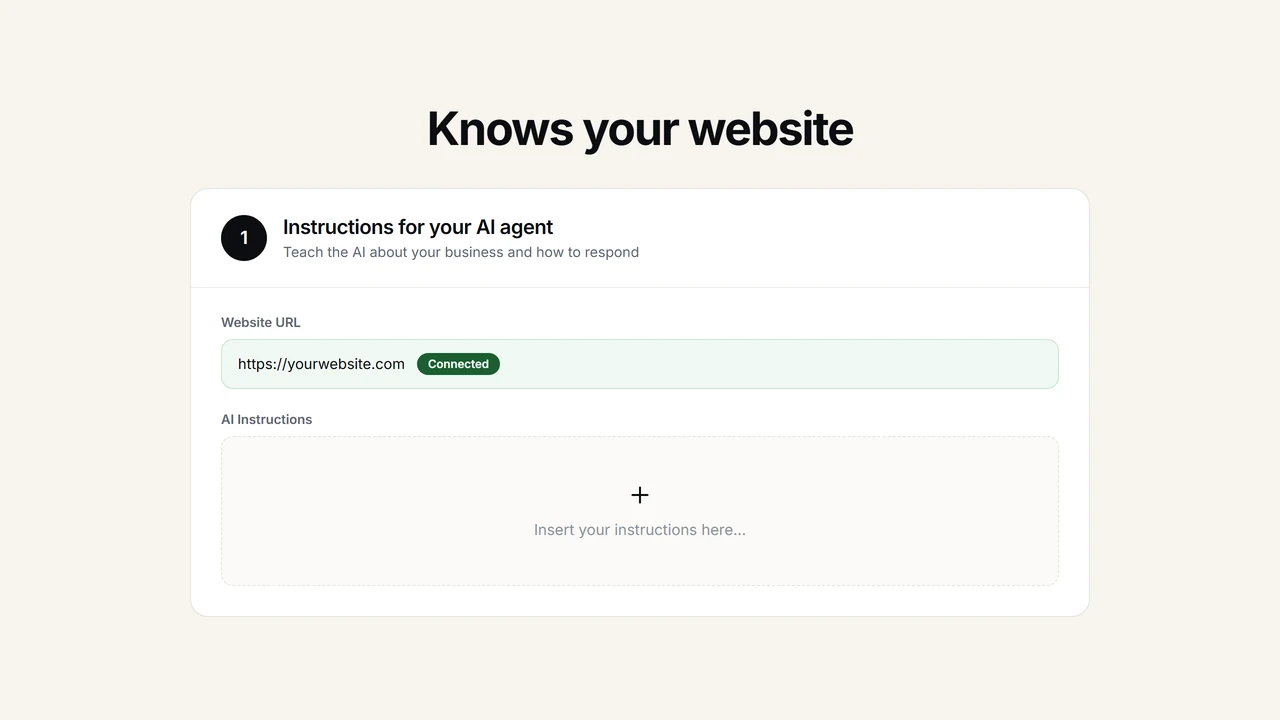
Behavioral instructions are the steering mechanism that keeps the chatbot aligned with your business rules. In the dashboard you write directives in plain language: "When a visitor asks about consultation fees, collect their name and project scope before quoting a range." "Never discuss competitor products by name." "If someone asks about wheelchair access, link to the Accessibility page at /accessibility/." These function as intent-level guidelines rather than keyword triggers — the model factors them in alongside crawled material each time it drafts a response. The result is a chatbot whose tone, boundaries, and escalation behavior reflect deliberate decisions made by the site owner, not generic defaults imposed by the vendor. You can revise instructions at any time and the chatbot adopts them on the next conversation without a redeploy or cache purge.
Multilingual coverage is where adding a chatbot to WordPress delivers outsized value compared to static FAQ pages or contact forms. The widget's interface layer supports 36 languages natively, and the underlying model infers the visitor's language the moment they send their first sentence. A German visitor browsing your English-language WordPress blog receives a German reply sourced from the English content. A Brazilian visitor on a Portuguese WooCommerce store gets fluent Portuguese answers without any separate translation layer. For WordPress sites already running WPML or Polylang, the chatbot complements the editorial translations by covering languages the editorial team hasn't localized into yet. For monolingual WordPress sites, the chatbot effectively adds multilingual support for free — at least on the conversational layer — which is a capability most small businesses would never commission a human translator to deliver.
Lead capture transforms the chatbot from a helpful utility into a revenue-generating asset. Conversations that the AI cannot resolve to full satisfaction — a complex project brief, a bulk-order negotiation, a complaint that calls for human judgment — trigger a lead-capture prompt. The widget prompts for an email address, wraps the entire dialogue into a single lead record, and posts it to your Asyntai account. Enable the email-forwarding toggle and the same package lands in your inbox within seconds. The follow-up agent — whether that is you, a sales team member, or a virtual assistant — opens a message that contains the full context of what the visitor needed, eliminating the ritual where the first human reply is "Can you describe what you're looking for?" because the visitor already described it in the chat. For WordPress sites that live or die on inbound leads — agencies, consultancies, professional services, B2B SaaS marketing sites — that context-rich handoff is the single most valuable thing the chatbot does.
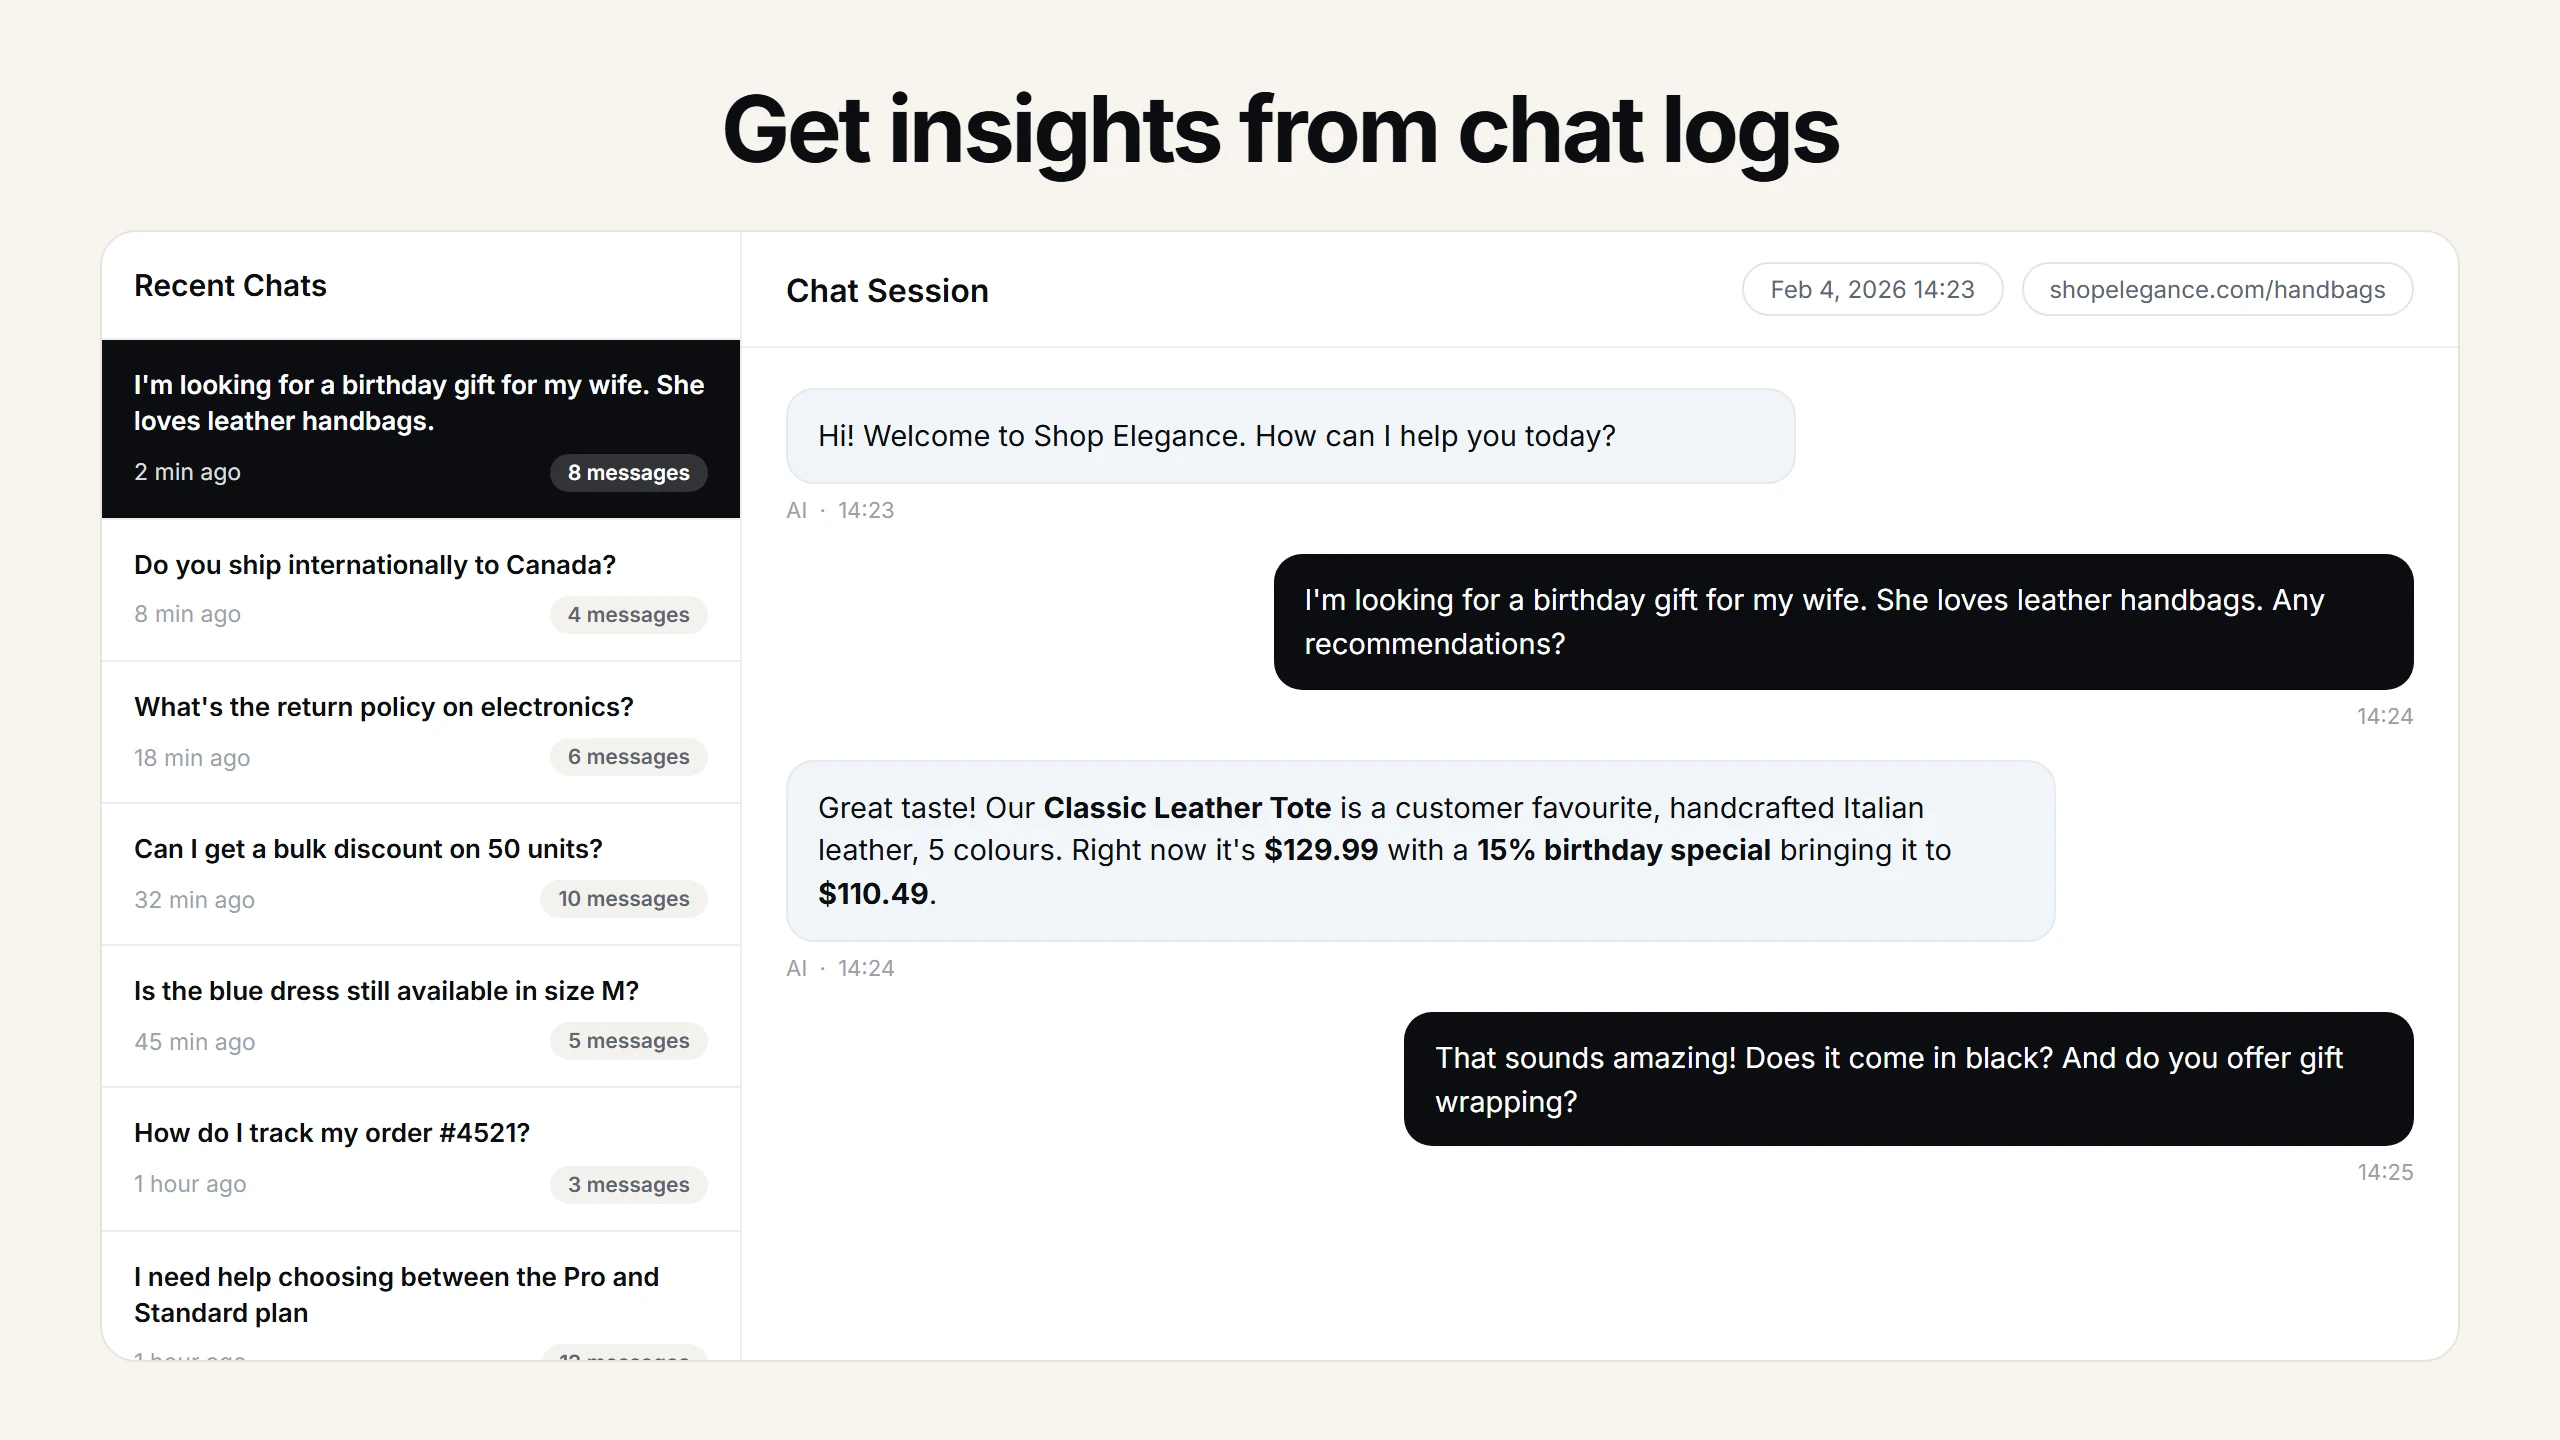
Analytics give you a continuous feedback channel between your WordPress audience and your content strategy. Each completed thread surfaces in the analytics panel broken down by subject area, referring URL, language spoken, and whether the outcome was a resolution, a lead, or an unresolved exit. Over time you spot trends: visitors consistently ask about a refund window your site never states explicitly, a disproportionate share of conversations start on a particular product page that lacks specification detail, a growing volume of queries arrives in Turkish even though your WordPress site has no Turkish content. Each of those signals maps to a concrete editorial action — a new paragraph on the refund policy page, a specs table added to the product template, a Turkish FAQ post that the chatbot can reference verbatim. Traditional analytics tools report clicks and page views; the chatbot reports what visitors wanted and whether they got it.
For operators running multiple WordPress installations — a freelancer maintaining client sites, an agency with a portfolio of WordPress builds, a franchise with regional microsites — a single Asyntai account covers several domains. The Free plan accommodates one property, Starter bumps that to two, Standard covers three, and Pro reaches ten. Each WordPress site connects independently and maintains its own indexed content, behavioral instructions, and visual theme. The agency bills one subscription and distributes chatbot access across its client roster. There is no data leakage between sites: the travel client's chatbot knows nothing about the dental client's content, and vice versa. Onboarding a new client site is the same three-minute install described above — download the plugin, upload, connect — which scales far more gracefully than asking each client to evaluate and subscribe to their own chatbot vendor.
User Context is the advanced mechanism that bridges anonymous chat and personalized assistance for logged-in WordPress visitors. On the Standard and Pro tiers, your theme can write a window.Asyntai.userContext JSON object in the footer before the chat widget spins up — containing whatever attributes your WordPress authentication flow makes available: display name, membership level, recent purchase category, account age, loyalty points. The model weaves those details into each reply it composes, so a returning Premium member inquiring about upgrade paths receives an answer that references their existing plan level and recommends a logical next move, rather than a generic overview written for anonymous traffic. Implementation is a handful of lines in your theme's footer or a lightweight mu-plugin that reads the current user object and serializes the relevant fields. No server-to-server integration, no webhook configuration, no API key exchange — just a JavaScript variable that the widget reads at bootstrap.
Cost stays predictable and proportional. The free tier covers one WordPress site with 50 messages per month — sufficient to validate the install, review real conversations, and confirm that the AI's answers meet your quality bar before investing. Moving to Starter for thirty-nine dollars each month raises the quota to 800 messages and adds a second connected site. Standard and Pro push further with higher volumes, more site slots, and the User Context personalization hook. For a WordPress site owner already paying for managed hosting, a premium theme, a forms plugin, and an SEO subscription, the chatbot fits within the same operational budget line rather than requiring a separate procurement approval. Adding a chatbot to WordPress is not a capital project — it is an afternoon task with a monthly subscription attached, and the free tier lets you start that afternoon today.